MR2 Owners Club • 7 years and I finally have a MOT - Page 8
Page 8 of 9

Re: Five years later the car is outside!

Posted: 25/04/21 13:03
by ayresyboy
Awesome work

Re: Five years later the car is outside!

Posted: 25/04/21 13:12
by chaos19810
Thanks!

I’m just ordering some woodsport arches as I don’t think I can get away with so much tyre out of the arch

Re: Five years later the car is outside!

Posted: 25/04/21 14:12
by ayresyboy
What's he charging? I have a pair in my garage. It's the older style that needs professionally fitting not his later bolt on ones. Andy

Re: Five years later the car is outside!

Posted: 25/04/21 15:59
by chaos19810
They are 195 for the bolt on style, I have a set of the other type but I brought them second hand and they need more more and skill than I have after the previous person butchered them

Re: Five years later the car is outside!

Posted: 25/04/21 18:16
by jimi
Looking good, won't be long now :th: looking forward to hearing about the first drive/rolling road :cool1:

Re: Five years later the car is outside!

Posted: 25/04/21 20:06
by chaos19810
Mapping is booked for the 20th July and the mot for the 25th july so we are getting closer. However a nice paint job will need to wait until next year

Re: Five years later the car is outside!

Posted: 26/04/21 13:27
by d-peg
Great stuff fella! awesome feeling when they get outside again. Mine (the V6) was in the garage for a similar length of time. It took a drunken JAE pinky-promise to get it done and working again!

Re: Five years later the car is outside!

Posted: 26/04/21 21:38
by chaos19810
It’s crazy to think if the hours put into the car and this Saturday it will be back out again to sort the tracking and maybe a MOT just for a job list of things to do.

Dyno day!!

Posted: 22/07/21 13:09
by chaos19810
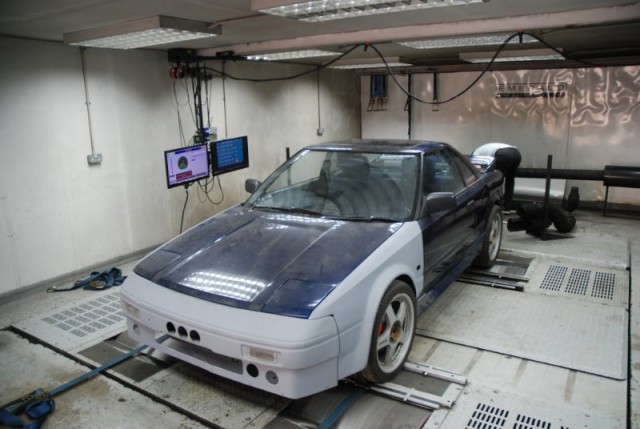
Well Dyno Day came around much quicker that I expected and after spending 10 hours the day before servicing and prepping the car I loaded the car on to the transported with only two goals for the day. First, I wanted the can to have a good shake down and to see if the engine mounts I had made and welded in would hold the engine in place and not fail. The second goal was to be able to drive the car out of the dyno and start getting it ready for its first MOT since August 2016 and finally I wanted to make a little bit of power, I had a goal of 335 hp.

So how did the day go?

I think badly I think sums the day It wasn’t terrible I met both of my goals. On the first run up and checks the car made 7hp and reached a coolant temp of 117 C.
DSC_0719.JPG

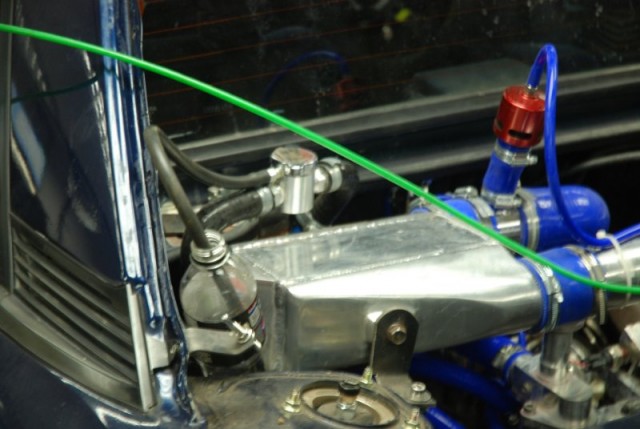
So clearly there was a problem, after a little searching I found a kink in the hose going to the rad. A few days before I decided to change the coolant pipe set up because I had to many connectors and they were rubbing, so after changing it it seems I did not see the kink I had caused. Solving this little problem took a few hours as there was no way of not having a kink in the pipe. The guys at emerald were fantastic they found some mild steel pipe 25mm opposed to the 28mm I was using, bent it to shape, found some clip and we solved the coolant issue, however in my rush I damaged the starter solenoid wire, and the car would not start and while an easy fix it still took time to find the fault and fix it.
DSC_0720.JPG
DSC_0723.JPG
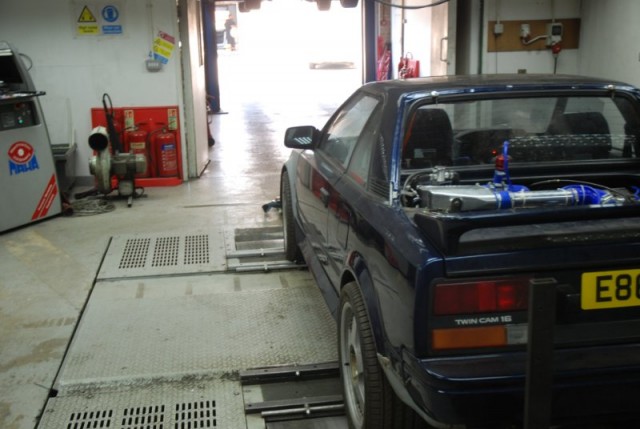
So after a few hours the car was back on the dyno ready to go, and this time it made a 40hp, before it developed a misfire so a check of all the wiring turned up nothing, so the spark plugs were pulled out and I don’t know how but 3 of the 4 ceramic casing were cracked. These were gapped and quickly swapped out and now the car made 69hp on the next run. From this point the mapping of the base map went well until the car stopped making boost, so again working over the hot engine a search found that the turbo to the intercooler pipe had worked loose, most likely when I was working on the hose and starter wire. A quick fix and off we go again, the car was responding well, the coolant temp was stable at 98C, and the car started to make boost 5-6psi so things were looking up until a huge back fire and the car started acting like it had ran out of fuel. So again, another search and the OEM temp sensor had fallen out, so the car was getting too much air and not a lack of fuel.
DSC_0725.JPG
DSC_0742.JPG


After the days events the base map was finished and with 5-6psi of boost the car made 197hp, now as we start rolling in the boost nothing happens the boost does not go up not matter what we do to the boost controller so at this point I decide that even if I fix the problem I would only get a max of 10-12psi, which is not ideal so I decide to end the session (it was 5.30pm) and go away and resolve all the issues before going for more power.
DSC_0744.JPG

The car is booked into Emerald again on the 22nd of October and the goal is to drive the car up to the session make my 300+hp goal and drive home.

Dyno sheet

Posted: 22/07/21 13:12
by chaos19810
DSC_0750 (2).JPG

Fitting rear flares

Posted: 25/07/21 14:34
by chaos19810
So after the Dyno it's time to get it ready for its MOT and the first and major problem I have is that the wheels do not fit under the arches. The main reason being that I have fitted ST205 GT4 front brakes and I need some spacers for my wheels to clear the callipers, then to square the car up I have the same size spacers on the rear wheels.

So I decided that I will fit a set of universal flares,

After cutting away the arch I found that a previous owner had used tiger seal to attach a new arch and a lot of filler to cover up the rust, after I cut off three sets of repair arches I finally got through to through the original metal.
IMG_4125.jpg
IMG_4125.jpg (104.61 KiB) Viewed 64 times
After a bit of planning and fiddling I decided the position trimmed the metal back and revealed the inner skin which to my surprise was perfect, I cut relief strips into the inner arch and hammered it up to meet the outer skin.
IMG_4127.jpg
IMG_4127.jpg (83.21 KiB) Viewed 64 times
The next stage is to weld the two skins back together, but they are now 7cm higher than they were before and all the dodgy repairs and rust have gone. I then attached the flares which fit really well considering they are a universal set.
IMG_4129.jpg
IMG_4129.jpg (58.81 KiB) Viewed 64 times
Tomorrow I will be finishing the welding, rust protection, paint and fitting the Rivnuts and attaching the arch.

Re: Fitting arch Flares

Posted: 28/07/21 14:03
by ayresyboy
top work fella

Only passengers side wheel rubbing, any ideas?

Posted: 09/01/22 13:18
by chaos19810
I have a unique little problem that I have been trying to find an answer too and after hours of researching I still have no answer.

My mk1 is rubbing its tyre on the front passengers side inner arch only it clears the inner arch on the drivers side. The car is very modified, it has celica st205 brakes on the front, bc coilovers and to get all this to work I’m using 17inch alloys with a 25mm spacers.

As i have said above the drivers side clears easily but the passengers side catches on the inner arch on full lock.

Any help would be appreciated.

Re: One wheel is rubbing any ideas?

Posted: 09/01/22 14:49
by ayresyboy
Adjust: the ride height on the coilovers / camber of the wheels?!?!

I'd take it to a professional, tell them the issue and get four wheel alignment with corner weighting.

Andy