MR2 Owners Club • Alternator Wiring Testing/Repairs - Page 2
Page 2 of 2

Re: Alternator Wiring Testing

Posted: 12/06/19 21:59
by lewiswhitmore524
What I'll do, is reassemble the harness and mark each splice with a band of coloured/white tape and upload that picture once the harness is back in the engine. Might be easier for a KY2 article.

Sure Jimi, anything that can help out is good.

The splice locations are actually in the BGB but i'll still update with a picture once its installed for the more visual among us.

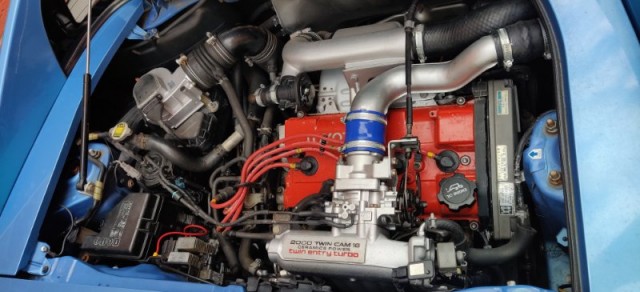
3S-GTE
Image

I believe the problem splices are E23 and E25 where the loom sits above the intake manifold. I'll double check and update though.

Re: Alternator Wiring Testing

Posted: 12/06/19 23:31
by jimi
lewiswhitmore524 wrote: 12/06/19 21:59 What I'll do, is reassemble the harness and mark each splice with a band of coloured/white tape and upload that picture once the harness is back in the engine. Might be easier for a KY2 article.

Sure Jimi, anything that can help out is good.
:clapping:
Spot on, I'll update the KY2 article with an extra section to include your pics, findings and acknowledgement. :th:
It's not an uncommon problem on MK2's so I'm sure it will be of great use to other owners :cool1:

Re: Alternator Wiring Testing

Posted: 13/06/19 22:11
by abovetherim
Fyi for the noise filter, on my na it's bolted to the rear bulkhead by the coil bracket.

Re: Alternator Wiring Testing

Posted: 18/06/19 9:26
by lewiswhitmore524
OK. Wiring Harness has been repaired now. I cut out the crusty looking corroded splices and re-crimped them using an open barrel splice. This was then sealed in with some adhesive lined heat shrink. I wrapped the loom using a mixture of non-adhesive vinyl tape, and fabric type loom wrap.

Here is the end result. I found it difficult when putting the loom back together to find a decent reference picture for how the loom should look, which wires branch off where etc, so this picture can be added somewhere for reference material.
YP37CKk - Imgur.jpg
The white tape marks the places where the splices are located within the loom. Note that I didn't remove the original loom binding in the section leading up to the fuse box connections. There could be further splices here, but i decided i'd leave them alone. Other than that section, I've had the entire loom apart.

The most corroded splices (and the one that was completely broken) were found in the section with the two white bands to the left of the manifold loom tunnel. This is where the majority of the splices are found ( i think i re-did 5-6 splices in this area)

This is the area of loom that drops down below the coolant connectors to the throttle body, and the loom forms a low-point when installed. My thinking is that this is the area where the water collects off the rest of the loom and drips from, and can become saturated with water. This penetrates the 25 year old splices and corrodes the connectors. Toyota use a sheet of what looks like adhesive lined tape folded in half, to cover their splices. All the ones i had removed, the adhesive was crusty and dry. Definitely age related deterioration. With new, tighter fitting adhesive heat shrink installed, i'm hoping this repair will now be good for another 25 years. :th:
IByRE6z - Imgur.jpg
Here is everything buttoned back up again after installation. As a side note, I finished the job with no bolts left over. The car also started first time with no connectors forgotten to be plugged in. Alternator is now charging a strong 14+ volts when running. First engine related job of this nature I've done so it's been a learning curve, but pleased with how the results came out nonetheless.

Re: Alternator Wiring Testing

Posted: 18/06/19 9:54
by peteV6R5
Nice work Lewis, very good work and very useful info... be great if Jimi gets this put into a useful guide in KY2

Re: Alternator Wiring Testing

Posted: 18/06/19 10:27
by SonicSW20
Very tidy, can you work on mine? :laughing

Re: Alternator Wiring Testing

Posted: 18/06/19 10:44
by lewiswhitmore524
SonicSW20 wrote: 18/06/19 10:27 Very tidy, can you work on mine? :laughing
You know, i actually really enjoy working on cars. I just lack some of the tools that make bigger jobs easier. MR2OC syndicate rent a unit with a 2post lift? :clapping: :laughing

Re: Alternator Wiring Testing

Posted: 18/06/19 10:49
by SonicSW20
lewiswhitmore524 wrote: 18/06/19 10:44
SonicSW20 wrote: 18/06/19 10:27 Very tidy, can you work on mine? :laughing
You know, i actually really enjoy working on cars. I just lack some of the tools that make bigger jobs easier. MR2OC syndicate rent a unit with a 2post lift? :clapping: :laughing
If we all lived closer to each other I would 100% be up for that!

Re: Alternator Wiring Testing

Posted: 18/06/19 19:30
by lewiswhitmore524
Sit Rep: went for a drive to matlock and back. It rained heavily on the way back with lots of spray and standing water. Not a single hiccup. Looks like the problem is finally resolved. I can enjoy my MR2 again without worrying about rain! Hurrah!

Re: Solved: Alternator Wiring Testing

Posted: 19/06/19 12:58
by jimi
Excellent, when I'm home I'll see about getting the info and pics into a KY2 article :th:
Thanks for making the effort to document your findings and repairs, I'm sure many MK2 owners will find it useful :cool1:

Re: Solved: Alternator Wiring Testing

Posted: 24/05/20 13:15
by jimi
Well it's taken me a while to get round to it :blush: but now added to Know Your 2
CLICKY :th: